
Vegan Sushi Tutorial
Here are my tips on how to make vegan sushi at home, and inspo on how to make truly tasty combinations!

The first time I made homemade vegan sushi, it was a total dud. I made quite a few mistakes during the process, and although the vegan sushi still tasted great I just knew that it could be better. I have since made sushi at home multiple times since then, and each time I feel that I’m getting closer and closer to perfection. I’ve listed below my top tips on how to make great sushi at home so that you can learn from my mistakes!
Making sushi at home is easier than you may think. I completely understand the intimidation though - you do have to buy special equipment to make homemade sushi, and you may not know how to use it when you get it. I hope this vegan sushi tutorial helps you out as I go into detail into what items are necessary to make homemade sushi. I even give you links to show exactly what I use to make my vegan sushi rolls!

What equipment is necessary to make homemade sushi?
The first time I made vegan sushi at home, I had no special equipment. None. The sushi tasted great but it didn’t hold together, and it unravelled as soon as I sliced it. Using these key items will put your closer to sushi perfection, but really the best way to get good at making homemade sushi is to practice. practice. practice. If it doesn’t turn out the way you want the first time, that’s totally fine! You’ll get better the more you do it. But, these items will certainly help you out:
Bamboo Sushi Rolling Mat: To roll the sushi.
Plastic Wrap: I recommend lining your bamboo mat with plastic wrap so it doesn’t get too messy. After all, you will be making sushi at home again and again!
Sharp Knife: Cut the sushi rolls with a very sharp knife so the insides don’t get squished and fall out.
Chopsticks: You can’t eat sushi without ‘em!
What ingredients do I need for vegan sushi?
I think any vegetable or vegan protein would totally work for sushi! In addition to sushi rice and nori (dried seaweed sheets), here are a few ideas on what to put inside your sushi. These ingredients can either be cooked or raw:
Mushrooms
Bell Pepper
Avocado
Tofu
Carrots
Cucumber
Zucchini
No matter what you use, be sure to slice it into small matchstick strips so it fits neatly inside of your roll. The smaller the pieces, the better! You want to have that additional room to mix and match your flavors.
How do I make sushi rice?
Sushi rice is KEY to making homemade sushi. Don’t think you can just substitute regular long-grain or jasmine rice for this recipe, it just won’t work. Sushi rice is unique because it’s very starchy, so it naturally sticks together which is what you want in a sushi roll. Once the rice is cooked, you’ll toss it with some sushi vinegar so that it gets a nice flavor. Don’t skip this step! The flavor of the rice is as important as the ingredients you add in each roll.
I’ve aways used Nishiki brand medium-grain rice for my homemade sushi. You can find this brand in most Asian supermarkets. To make the rice, I simply follow the measurements and instructions on the bag, which are as follows (I’ve added a few extra notes):
Ingredients
1 1/2 c rice
2 c water
2 tbsp sushi vinegar (alt: combine 4 tbsp rice vinegar + 2 tbsp sugar + 1 tsp salt)
Directions
Rinse the rice under cool water until the water color is clear.
Combine rice and water in a medium saucepan.
Bring the rice to a soft boil, then reduce heat to low. Cover and simmer for 20 minutes, or until moisture is absorbed.
Remove from heat and let stand, covered, for 10 minutes.
Transfer the cooked rice to a large bowl. Pour the sushi vinegar on top and give it a good toss so that the grains are coated.
Using a rice paddle or a large spoon, cut through the rice at 45 degree angles to separate the grains, turning the bowl as you go. Gently flip the rice over and continue the cutting motion. You don’t want to stir the rice, or you risk breaking down the grains into mush. Basically what you’re doing here is helping the rice cool down. If you let it cool down on its own without the cutting motion, you risk having it dry into a large blob.
Once the rice is warm but not hot, cover it with a wet towel and let it sit at room temp. Don’t store it in the fridge, or the rice will become too hard.
Sushi rice is served best at room temperature - not too hot, not too cold. I recommend making and using sushi rice the same day.
What are your tips for making sushi?
Once your sushi rice and sushi ingredients are ready to go, it’s time to make sushi! My detailed instructions are below, but here are a few tips that will make your homemade sushi experience even better:
Cut and/or cook all ingredients ahead of time. In French they use the term “mise en place”, which can be translated to “putting in place”. Yes, making homemade sushi requires preparation, but the final act of rolling the sushi itself is easier because of it. Before you get started, make sure all of your roll ingredients (veggies + proteins) are already cooked and/or cut into matchsticks. Have these ready to go on your workstation before you start rolling your sushi, this way you can just grab and add them as you make your rolls.
Use a sharp, sharp knife. This was one of my key mistakes when I made my first sushi roll. I sliced the sushi with one of my regular kitchen knives and the rice and ingredients just fell out of both ends! Make sure you use a super sharp knife for cutting sushi - and keep it in tip-top shape by sharpening it regularly.
Roll your sushi tight. When rolling the sushi in your bamboo mat, be sure to tuck the ingredients in and roll tightly so that it doesn’t unravel when it’s time to cut.
Don’t overstuff your sushi. Only add 2-3 matchstick pieces to each roll. If you add too much, your sushi roll may not close.
Handle the sushi rice with wet hands. Keep a bowl of water nearby and dip your fingers in it before handling the sushi rice. It’s sticky, so the water keeps it from sticking to your hands.
Split your nori sheet in half (lengthwise). This way, the sushi will be smaller and easier to work with.

Recipe
Prep Time: 30 mins
Active Time: 20 mins
Cook Time: 20 mins
Rest Time: 1+ hrs
INGREDIENTS
4 sheets of nori (dried seaweed sheets)
1 batch of sushi rice
Thinly sliced vegetables, tofu, avocado, etc.
Soy sauce, for serving (sub: coconut aminos if gluten-free)
Directions
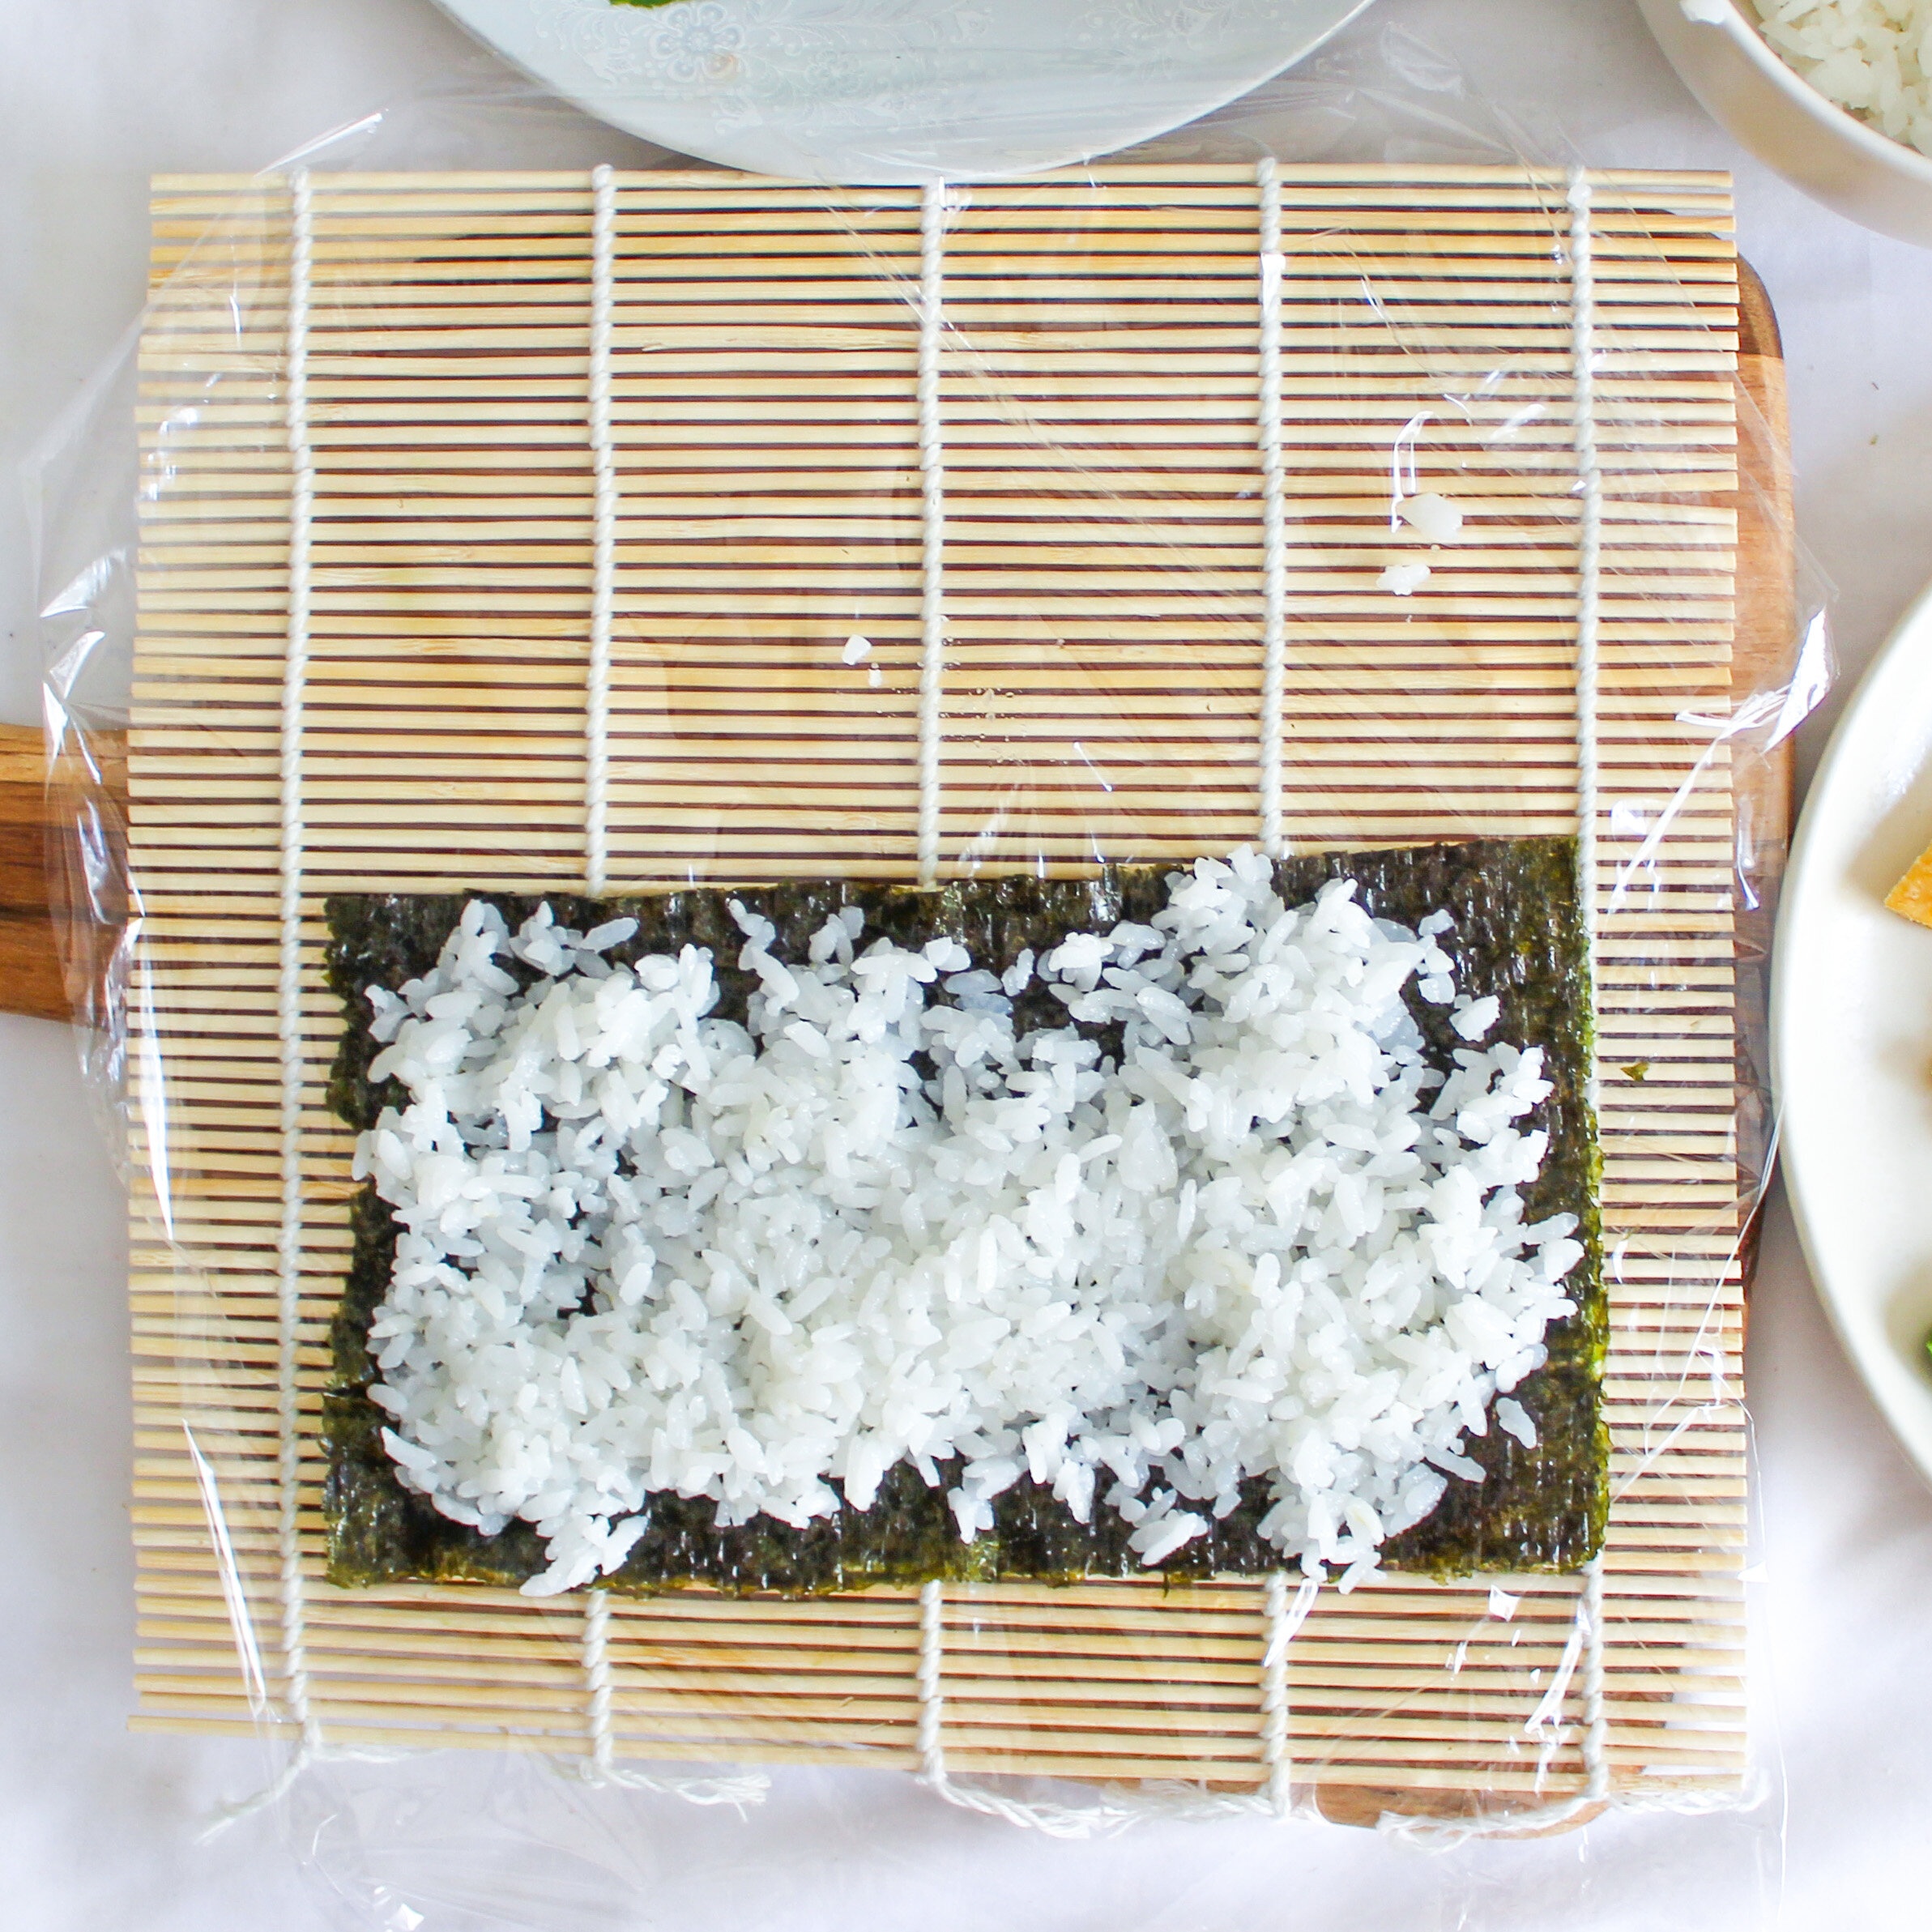
Cover your bamboo mat with plastic wrap. Take one sheet of nori and split it in half lengthwise.
Place the nori on the bamboo mat. Wet your fingers and scoop a palmful of sushi rice onto the nori. Spread it out gently with your fingers so that the entire sheet is covered. Flatten it gently, but don’t smush it. You want an even layer of rice that’s not too thick.
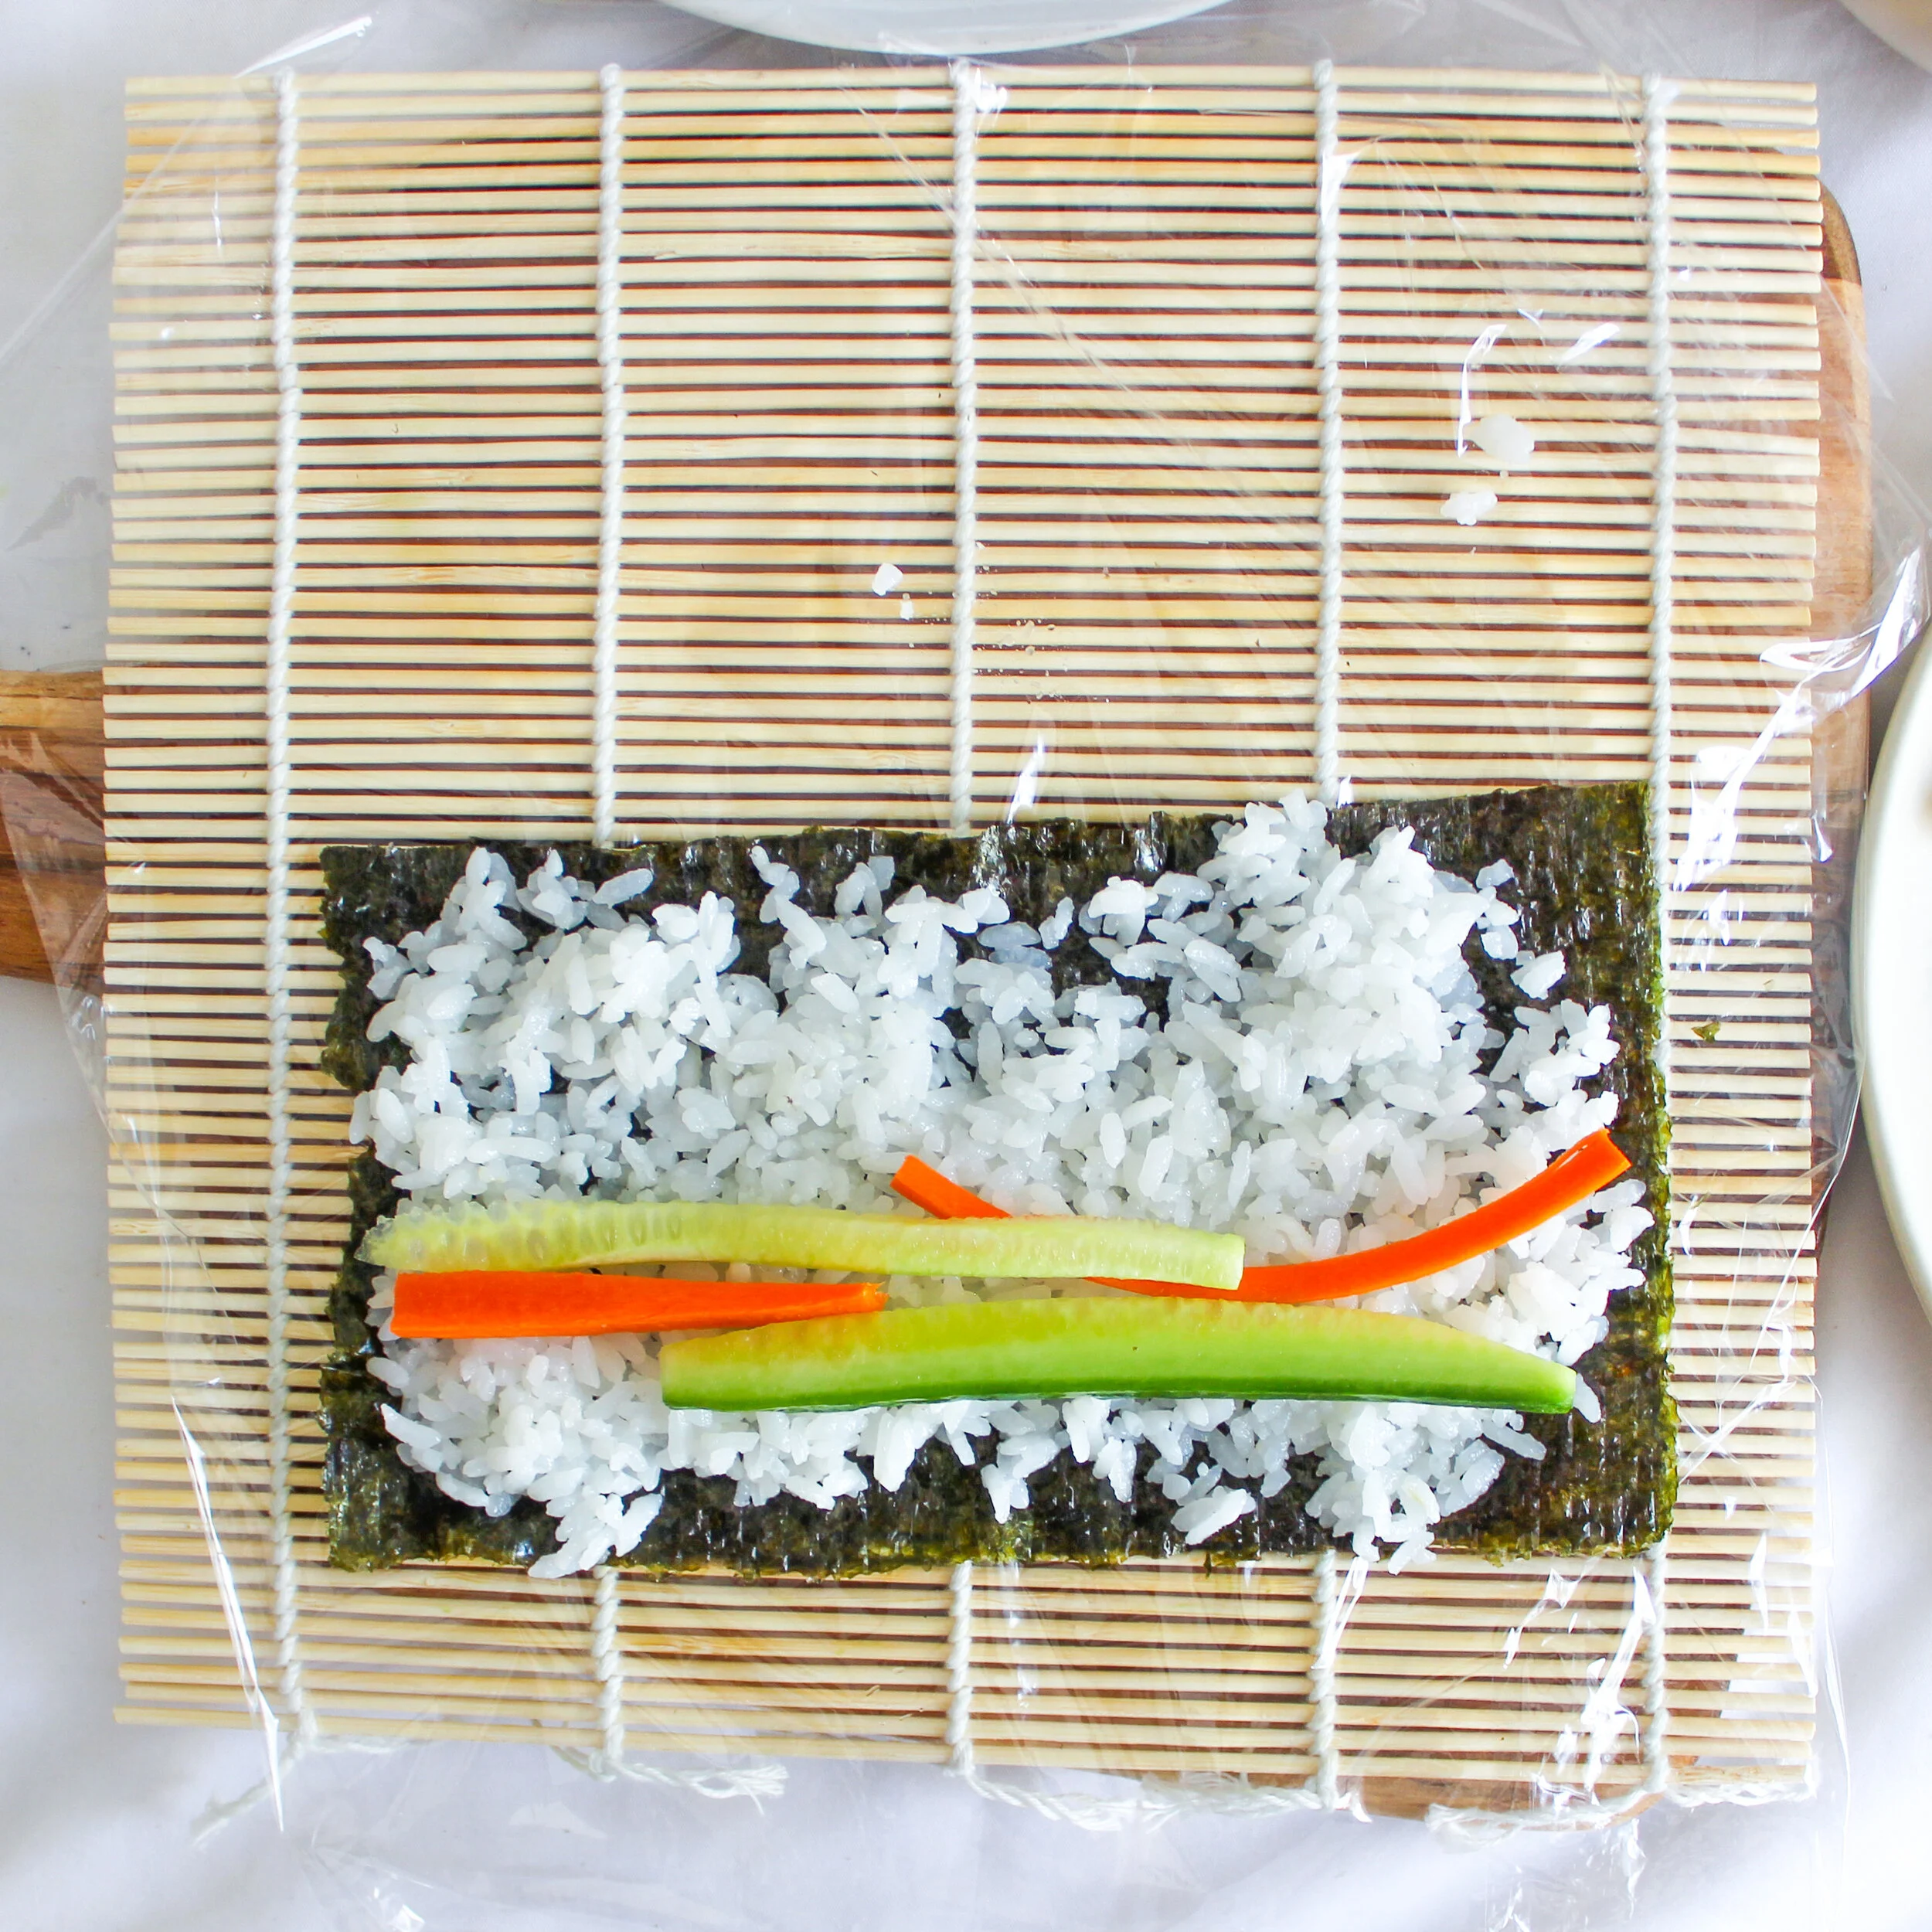
Lay your thinly-sliced vegetables length-wise across the rice. I recommend only adding 2-3 pieces so that the sushi is easier to roll up. I like to do combinations like avocado-tofu, mushroom-carrot, avocado-carrot, mhm.
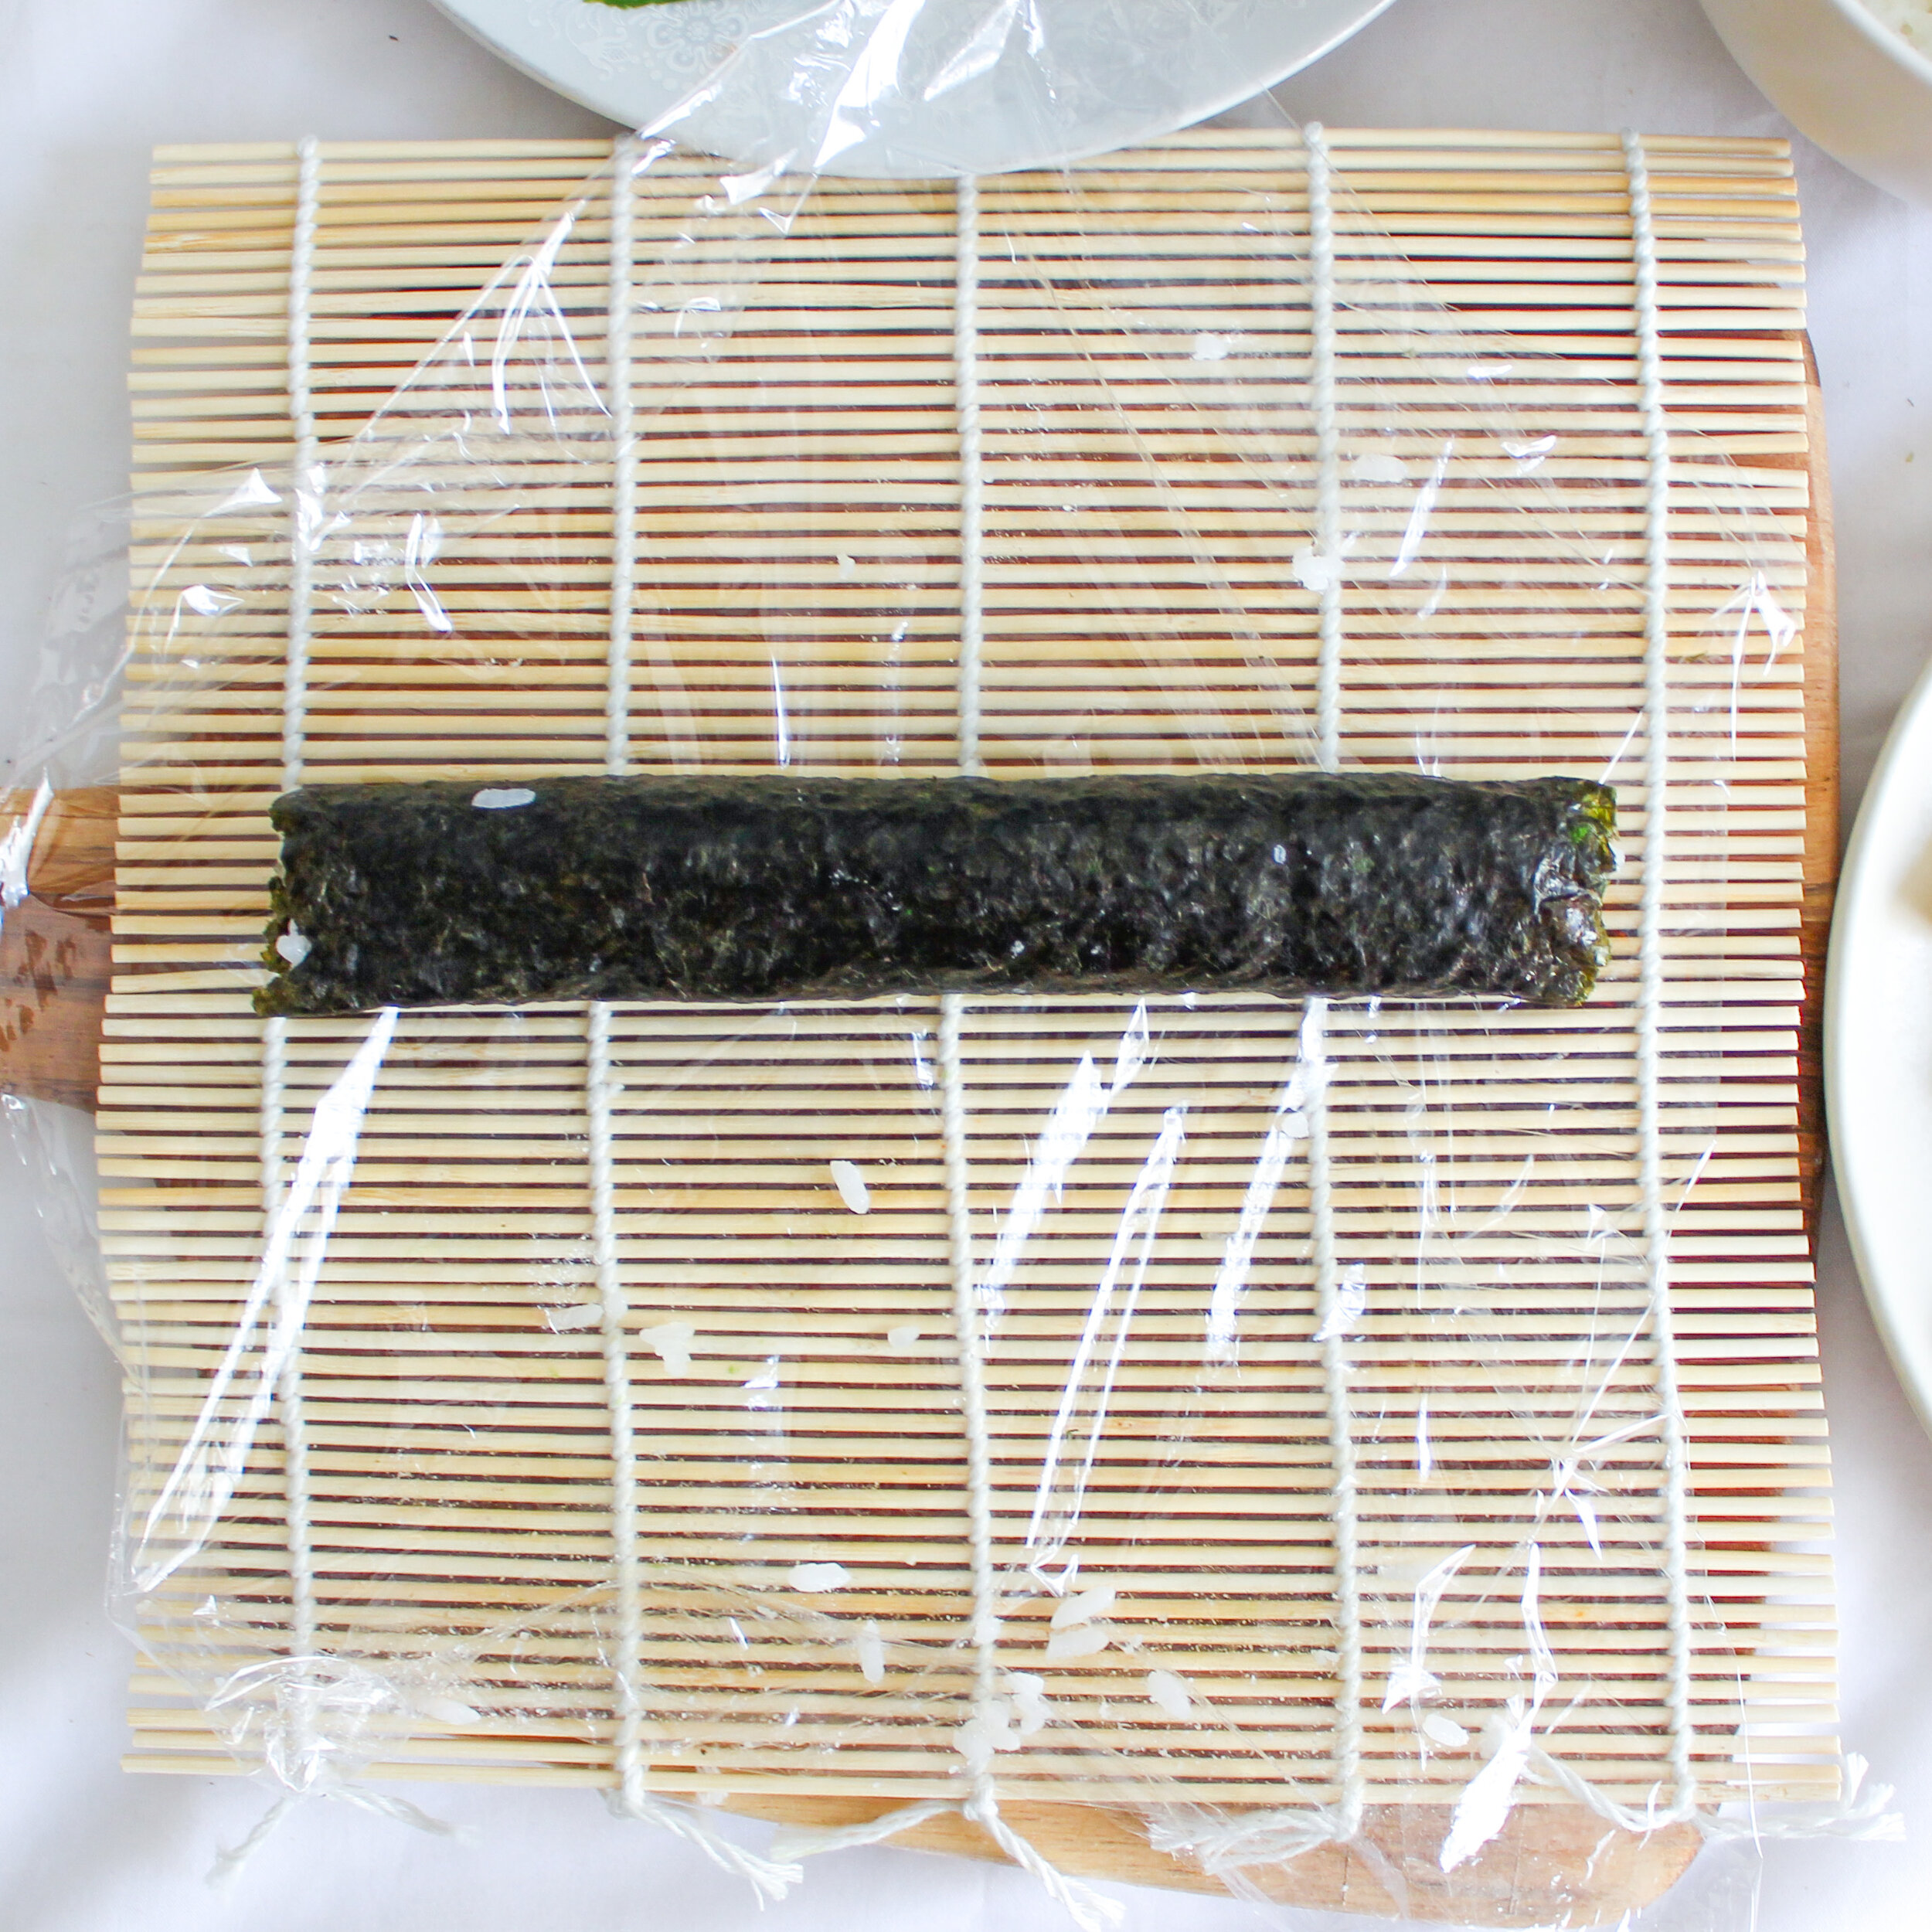
Lift up the bamboo mat, and roll the sushi about 1/4 of the way, giving it a squeeze so that it sticks. Be careful to not get the plastic wrap trapped inside the sushi. If that happens, just lift it out. Unfold the bamboo mat and repeat this step until the sushi is completely rolled up in a spiral, being sure to stop and squeeze each time to that it stays together.
Unfold the bamboo mat and plastic wrap. Place the sushi roll on a cutting board and slice it with a sharp knife. Use a sawing motion instead of pressing it down (this prevents the ingredients from falling out of the sides).
Serve with soy sauce!