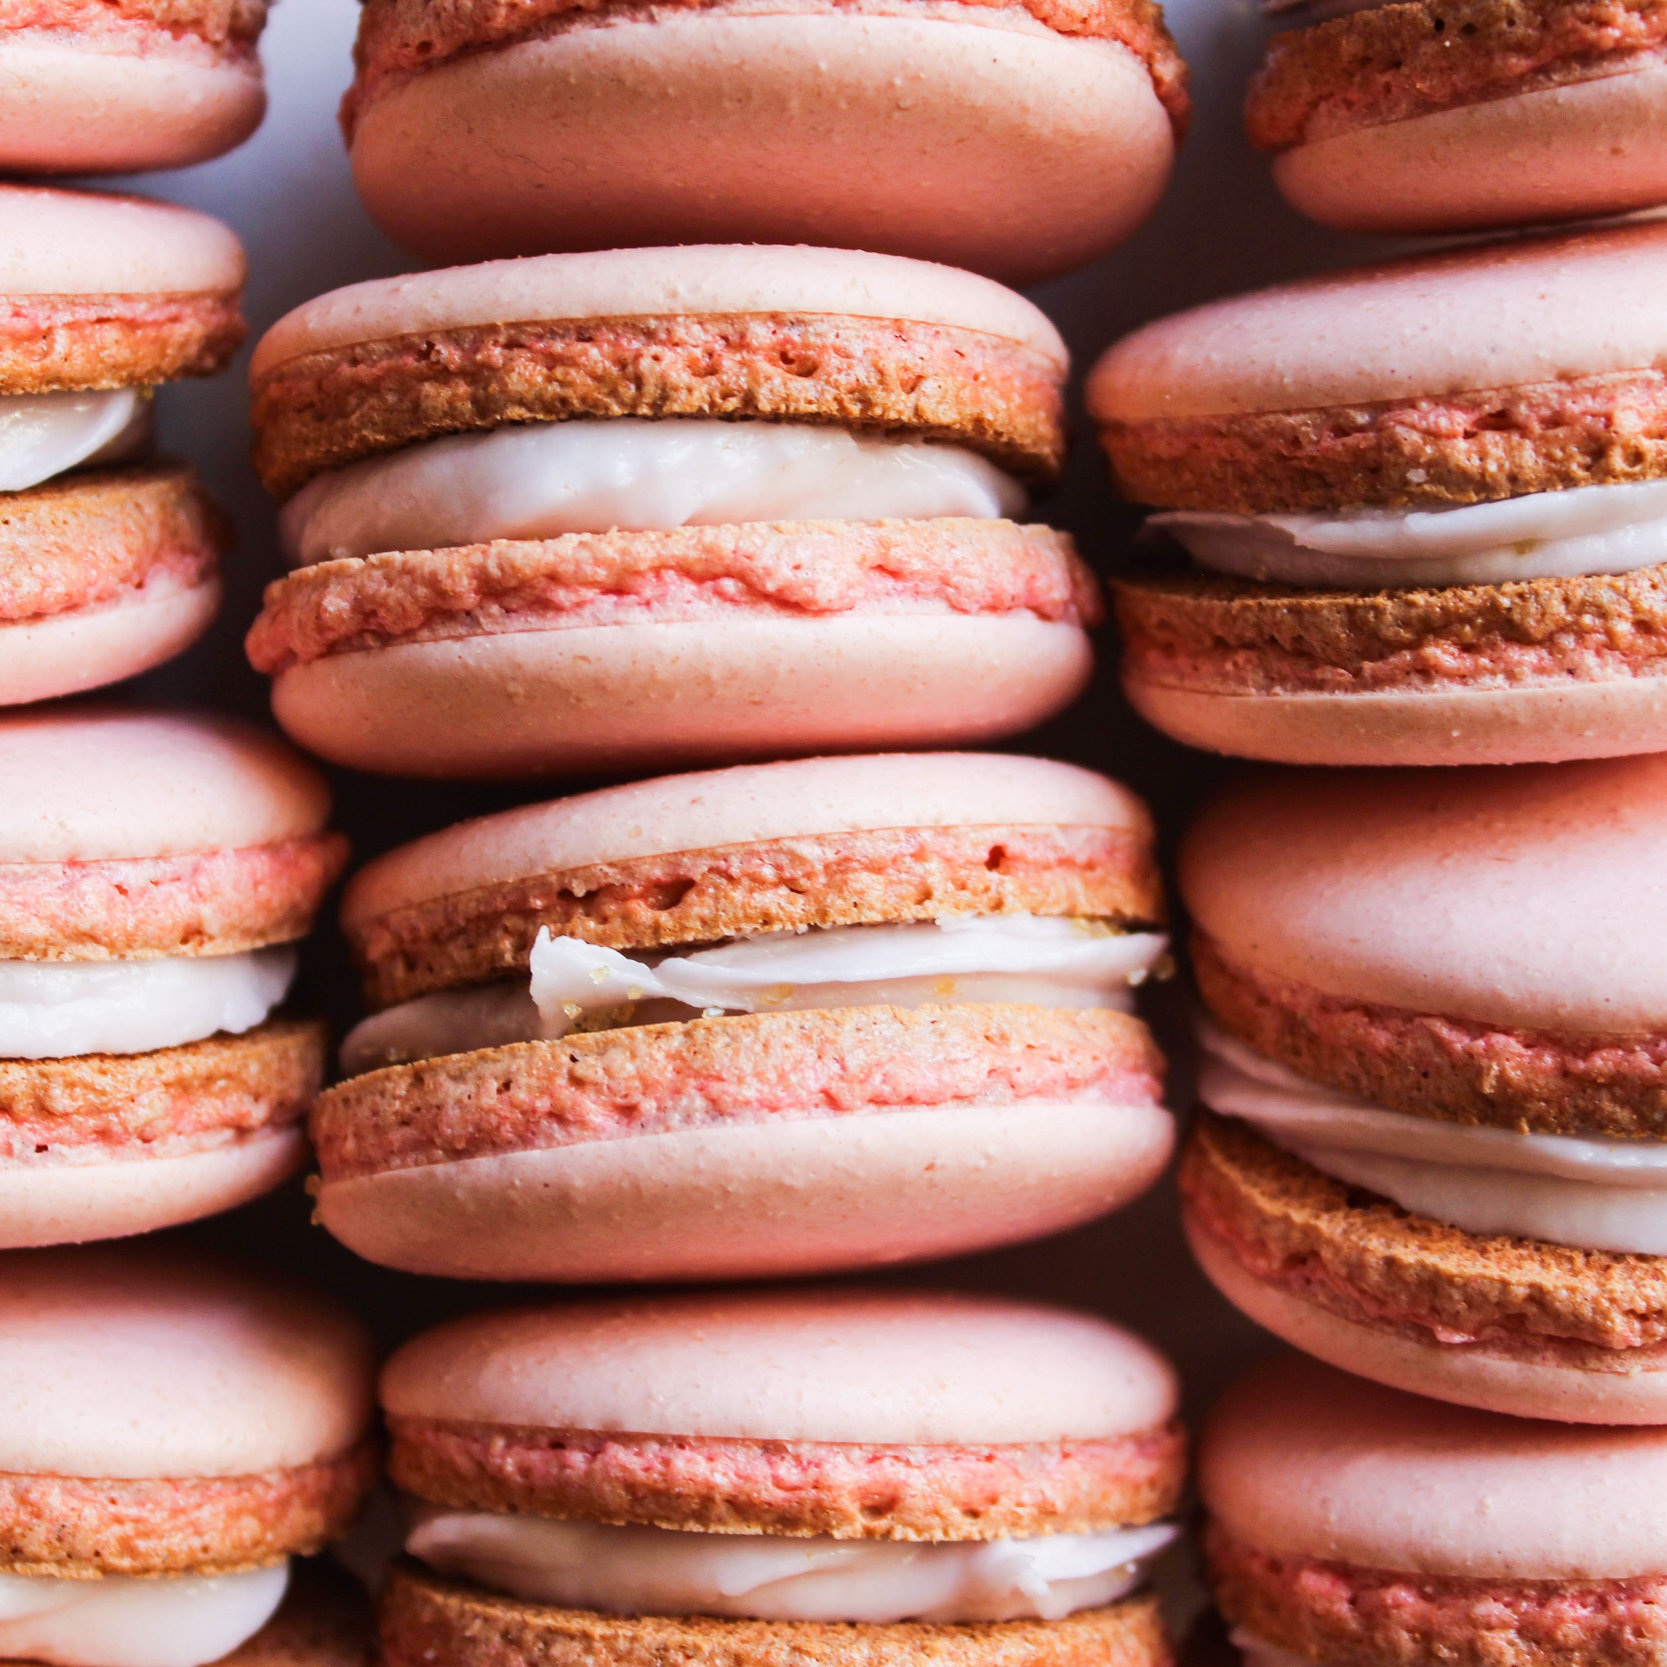
Perfect Vegan Rose Macarons

vegan macaron recipe aquafaba.jpg

I made VEGAN macarons, and they turned out PERFECT. On the. first. try. Wow.

Macarons are notoriously finicky little beasts that will self-destruct when they come in contact with a gust of wind, a droplet of moisture, or a one degree temperature change during the baking process, which is why I was totally expecting my first vegan macaron attempt to turn out terribly. I have been baking macarons for a few years now, and to this day I still hold my breath when I open the oven door for the first time to take them out because the chances of them fluffing up perfectly and the chances of them exploding into a crinkly mess are exactly 50/50 (ok, more like 30/70).

But, I'm in the vegan macaron game now, y'all! Macarons are one of those treats that I have been wanting to make vegan for a while now, but I was nervous altering my tried and true macaron recipe because it took me so long to get it right. I was worried that making even one itty bitty tweak would be a recipe for disaster, but I took the plunge anyway and decided to try it out. To my delight, these vegan macarons actually turned out perfectly! The secret sauce here is using aquafaba as a direct replacement for egg whites.

rose macarons recipe.jpg

What is aquafaba, you may ask? Aquafaba is the gelatinous liquid that you find in a can of chickpeas. Yes, that stuff. You probably just pour it down the sink when you drain the can of chickpeas, but little did we know that stuff is macaron making gold. GOLD! It makes a wonderful egg white replacement because it is viscous and whips up into a perfect meringue, which is the basis for the macaron cookies. So, if you want to make this vegan macaron recipe, start saving up your aquafaba now! I'll tell you how what to do with it down below in the recipe portion.

If you're reading this, I'm just going to assume you have a basic understanding of how to make macarons. There is a lot that goes into it, and I've written about the process in detail before. Check out this blog post for my tips on how to make the perfect macarons.

gluten free macarons recipe rose.jpg

Basically, to make perfect macarons you need to do a few things:

  • WEIGH every ingredient beforehand

  • Use metal bowls and make sure they are sparkling clean

  • Properly fold your macaron batter until it can form a figure-8 ribbon (and not a stroke more)

  • Use a macaron silpat mat

  • Let the macarons rest on the counter before you place them in the oven (this ensures they can form their cute, ruffly feet)

  • Keep the temperature in your oven consistent

You'll also want to make sure you have a few kitchen tools on hand and ready to go:

Not too bad, right?

macarons perfect feet tips.jpg

To date, I have only ever made macarons using the French method, but this vegan macaron recipe uses the Italian method, which is vastly different. With the French method, you are whipping up your egg whites (or aquafaba) into stiff peaks and then folding in the almond flour + powdered sugar dry mix after. However, for the Italian method you first make a marzipan batter with your almond flour + powdered sugar. Then, you whip up your egg whites (or aquafaba) and drizzle in a hot simple syrup into the meringue before folding in your marzipan. It's a bit more involved, but considering that this recipe turned out well, I'll certainly be trying out the Italian method again in the future.

I made vegan rose macarons because I was really in the mood for something rose flavored. I picked up this rose water by the brand Sadaf at my local Indian grocery store. It was cheap, and I'm sure you can find rose water in the ethnic aisle of a grocery store near you. Just make sure you pick up 100% rose water that is food grade and all natural (some rose waters are only meant to be used for skincare, so make sure you read the label)!

Ready to make your very first vegan macarons?! Let's go!

Ingredients

Macaron Shells

  • 75 g of reduced aquafaba **

  • 1/8 c of water

  • 100 g granulated sugar

  • 100 g almond flour

  • 100 g powdered sugar

  • pinch of cream of tartar

Rose Buttercream

  • 60 g unsalted butter, softened

  • 50 g powdered sugar

  • 2 tbsp. rose water

Directions

  1. Preheat oven to 300°F. Place your Silpat mat on your baking sheet and set aside.

  2. Add 37g of reduced aquafaba and cream of tartar to the bowl of your stand mixer fitted with the whisk attachment. Turn the mixer to medium high speed, and beat to soft peaks. It should be fluffy and wiggly (5 - 10 minutes).

  3. Meanwhile, pour your granulated sugar into a clean saucepan along with the water. Do not stir, and clip your thermometer. Turn on the heat to medium-high. Bring the syrup to 245°F.

  4. While this is happening, prepare your dry ingredients. Use your spatula to push 100g of powdered sugar and 100g of almond flour through a mesh sieve into a large metal mixing bowl. Pour your remaining 37g of aquafaba into this dry mix and combine it well until thoroughly moistened. Hello, marzipan!

  5. Once the sugar reaches 245°F, slowly pour it onto the fluffy meringue while the mixer is still on medium. DON'T stir in any of sugar that sticks to the sides of the bowl. Turn the mixer back up to medium high and let it go until the outside of the bowl feels cool to the touch (about 5 - 10 minutes). At this point, the meringue should be glossy, white and sticky.

  6. Turn off your stand mixer. Add 1/2 of the meringue into your marzipan, being careful not to grab any of the candied sugar on the sides of the bowl. Stir it until it’s mixed well and thoroughly combined.

  7. Add the rest of your meringue into your almond mixture – again, being careful not to grab any of the candy bits on the side of the bowl. Use your spatula to carefully fold the mixture together, turning the bowl as you do so so gravity helps you out a bit. Make sure to scrape from the bottom to the top so everything is getting picked up and incorporated (if using food coloring, add a drop of your gel food coloring during this step. I used pink).

  8. Use your spatula to scrape along from the top of the bowl, around the side, around the bottom, and back up the other side to the top of the the bowl. You should be cleanly picking up the whole mixture and folding it over onto itself. Do this gently until everything is incorporated. The batter should be relatively thick at this point. Now, alternate between smushing the batter along the sides of the bowl and scraping and folding – slowly and gently, until you can lift the batter with the spatula and draw a figure 8 with the batter that falls off. Once you can do this, STOP. Your batter is done.

  9. Line a tall glass with your prepared piping bag/tip (just like a bag in a trash can). If using a tip, I like to twist the bag just above the tip and smush the twist down into the tip. This prevents batter from leaking out. Pour your batter into the bag and either twist or tie it closed. There should be enough batter to fill the bag one more time. Cover what’s left in the bowl so that it doesn’t dry out.

  10. Grab your prepped baking pan lined with a silicone mat (or parchment paper if you haven’t gotten a mat yet, but remember you may have to adjust your baking time and your cookies won’t come out as perfect circles). Holding the piping bag vertically over the baking pan, gently squeeze until you’ve made a circle about an inch in diameter. Stop squeezing, and quickly make a small circle with the piping tip as you lift it. This will prevent your macarons from having nipples. Pipe your next macaron about 2.5″ from your first one. Continue until you’ve filled your tray.

  11. Slam the tray down on a flat surface to bring all the bubbles up and out of your macs. I like to do it two or three times on one side of the tray, rotate, another two or three times, rotate, so on and so forth until I feel like the bubbles are all gone. Hit the tray around 20-30 times. If you have stubborn bubbles, you can pop them with a toothpick.

  12. Set your tray on a flat surface and wait for the macarons to form a dry skin (about 30 minutes). This is imperative because without the skin, the macarons will probably explode in the oven. This skin keeps all the steam inside the cookie and allows them to lift and form feet.

  13. Once you see that the cookies are no longer shiny and you can lightly run your finger along the surface without it sticking to you, they're ready for baking. Put your cookies in the oven on the lowest rack (if using parchment, you may need to use the middle rack). 

  14. Bake the macarons for 17 minutes. If your oven has hot spots, rotate the tray at around 12 minutes.

  15. After 17 minutes, pull the tray out and set it on a cooling rack. Do not attempt to remove your macarons yet! Wait until they are totally cool, and they should peel right off.

  16. Find matching pairs and fill with rose buttercream.

  17. Put into an airtight container place them in the fridge for at least 24 hours before enjoying (it's hard to do, but they will taste even better).

  18. This recipe makes between 30 and 45 shells depending on how large you pipe them. They can be put into an airtight container and refrigerated up to a week and frozen for up to six months.

Rose Buttercream

1. Beat all ingredients together in a large mixing bowl. Fill a piping bag with the buttercream, and use this to fill your macaron shells.

**Reduced aquafaba: drain two cans of chickpeas and add the liquid to a saucepan. All you do is turn the heat on low and let the liquid simmer until it’s reduced by about a third. Allow to cool completely before using in your macaron recipe.

Adapted From: Cooking on Caffeine & Bear Naked Food

Previous
Previous

Chocolate Caramel Pretzel Bars

Next
Next

Salted Caramel Peanut Butter Cups